

Depending on the size of your product range, product photography can be an extensive project which if not executed properly can become a huge waste of time.
I have seen companies trying to produce own product images in-house, without professional help or experience, wasting a massive amount of time and resources. And in the end re-shooting the whole range or end up with a large amount of low quality images.
In this guide, I will set out a simple plan for successful execution of product photography project that would work for almost any business. I will draw from years of experience producing product images for printed catalogues, adverts, brochures and e-commerce websites, ranging from small handheld items up to couple of meters wide and tall products; and in-situ installations.
Things to consider before starting your product photography project
What are your goals, reasons for and planned use of your product images?
Are you refreshing your e-commerce shop, producing a product catalogue or just need images for your promotional materials? Would you use your images only digitally, are you planning to get them printed and if, what sizes would you need? From my experience, the images are generally used for both print and digital. Even if your initial plan is digital or online use, sooner or later you will want to produce printed material – so always keep your original files.
Know your products
To successfully execute the product photography project, you need to know your products. How big or small they are – are you going to need a large space or is just a table enough? What materials are they made of? Highly reflective, deep black, polished chrome products or glass have proven to be more difficult to shoot. How complex they are? Do they require assembly? Do they contain loose parts that need to be shown separately? If your range contains product that are similar in appearance or shape, try to plan for consistency – these products would look best if shot from the same angle with the same lighting setup.
Prepare on the technical side
Do you have a small studio already set? Do you need to buy better DSLR camera? Are you equipped with good lighting?
Camera
You will need a camera with full manual control and a hot shoe – a small metal bracket at the top of the camera where you can attach external flash or a wireless trigger, and it needs to have the ability to shoot in RAW format (not just JPEGS). Even the entry level DSLR will be enough if you don’t want to overspend or your budget is very tight.
Lighting
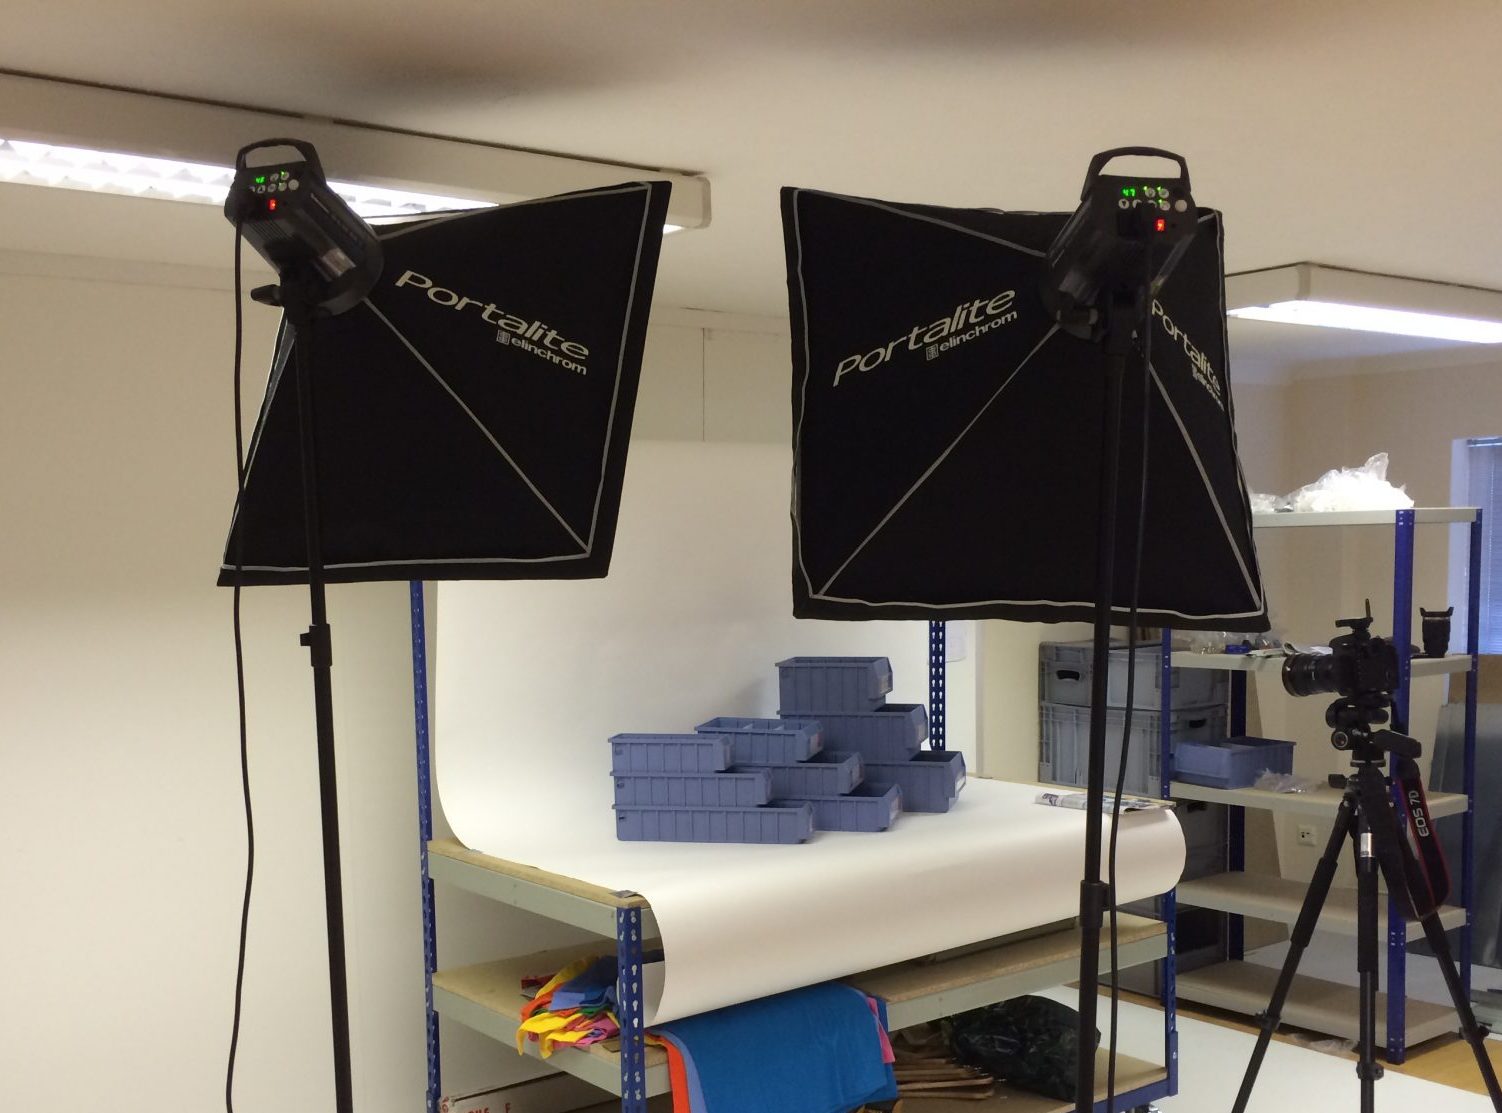
Depending on the size of your products, you will need a minimum of 2 studio strobes (mains powered flash heads mounted on tripods). Again, depending on your budget, you can buy cheaper strobes that will do the job or invest in professional strobes that will cost few times more but will produce more accurate lighting. (Cheaper strobes sometimes lack in producing perfectly white light and your images can appear slightly purple-ish even with white balance set for flash – which even though not ideal, can be corrected in your processing software.
I would advise against using static lights as these, although you might have 500watt lights, will not produce enough light for photography.
Space
Depending on the sizes of your products, you might need to use a large room with white walls and ceiling or just a small table with a roll of white background paper.
If your products are quite large – tall and wide – and you couldn’t fit them on a table, then you might need to use an empty room. Either way , make sure that you always have white backgorund that is 2-4 timess bigger than the actual product viewed from any angle – basically you need to see a white background all around the product (to make removing the background easier as well as for better light distribution). If you are utilising a room, it would ideally have a solid white ceiling, floor and walls – sometimes the walls can be covered with white roll of paper or sheets, the floor can be painted or covered with non-glossy white material. The idea is that the light from your strobes will bounce and produce more even lighting.
Processing software
All photos taken must be processed. You don’t want to see the background, just the product. And you also want the products look the best they can – sometimes you will need to clean small blemishes, scratches or adjust brightness, contrast and colours. For easy processing of large amount of images, you will need two software products. One for managing and adjusting the photos, and another for removing the background and making detailed adjustments.
There is a number of different applications that would suit the job.
I would however recommend nothing else but Adobe Lightroom and Photoshop that you can get in a single package.
Prepare a list
Prepare a list of products so you can manage the whole photoshoot easily. Use a spreadsheet (MS Excel or Google Docs) and keep it updated as you go. If you have a larger amount of products it is best to divide these into smaller chunks.
Photoshoot
Always shoot in RAW format! This is one of the most important advice. JPEGs do not like to be edited too much as they loose quality and do not hold enough of image information.
Set your camera to full manual mode. Set your ISO to 100, White Balance to Flash and shutter speed between 1/200 – 1/250 of a second. This is your basic camera setting. If you are shooting products that will have their background removed and require sharpness throughout , use narrow apertures (large F numbers such as F19, F22…). Wide apertures (e.g. below F4)will produce shallow depth of field and your images will be blurry at edges. If you don’t fully understand these settings, read my 5 things to set before you take a photo.
Use automatic focusing to keep images sharp and have your camera mounted on a tripod if possible – this will help to keep your images being shot at consistent angle.
Presuming you already have studio strobes, you will need wireless trigger and receivers either built in the flash heads or as a connected accessory (these would usually be included if you are buying a kit).
Basic setup: image
Create consistent views and always take more images than you need – these can come handy later. If you have multiple types of the same kind of product, try to find and shoot all products at the same angle. As the main product image. You will however want to produce different views. Shoot from all sides, look at the product and think what is the one view that shows most important parts at once – a 3 side view. Spend some time experimenting first to find the best angles – explore product images of your competitors for inspiration – see what you like and what would you do differently.
Once you finished a session, download your images to your computer harddrive as soon as possible. Think of the folder structure to help you manage the photos easily. Inside your main product folder, have sub-folders divided by either shooting date, product type, manufacturer or category.
Import your images to Lightroom. Choose one image you are quite happy with and adjust the settings to get the best result. Save your setting as you can re-use it on all images (sometimes you will need to micro adjust individual image, but having one global setting that considers the same lighting conditions is a great time saver).
Mark/rank images that you are happy with and start processing these in photoshop one by one. Marking/ranking images in Lightroom will help you separate the good shots from the bad ones by easy filtering. The easiest way is to use star rating. Once you filter the images you are happy with you will want to remove the background. Removing background in Photoshop is fairly easy but time consuming. This would however require a separate guide.
Once you have image processed in photoshop, save the file with new name as a PSD file – think of the naming convention – use a name that is searchable. Using a product code or SKU within the filename has proven to be the best choice for most product photographs. Keep the image number within the name as well so you can get back to the original RAW image if needed in the future. (For example, if your RAW image file name is IMG_12345, save the PSD file as PRODUCTCODE-12345.psd, obviously replacing the PRODUCTCODE with the actual product code of the product)
Save files categorised in subfolders by product type, category, brand or even in a single folder but separately from your RAW files.
Try to keep the aspect ratio of your images the same. If you for example producing images for e-commerce site, your images should most probably be square rather than rectangle. This can be easily done in Photoshop, using the crop function.
Now you have a set of clean and ready PSD image files and need to export them. You can batch resize all at once and that will help you produce a set of images for any application. The PSD files can be used anytime later on if you for example need higher resolution images for different application. For printed projects, the PSD files can be used directly as they hold all image information and are at the full resolution available from the original shots.
Finally, use the images as you need. Please get in touch if you would like me to help you – a free chat doesn’t cost anything.